
Let’s be real for a second.
We’ve all seen those aesthetically pleasing jars of bone broth at the grocery store.
The ones with the minimalist labels that cost like $12 for a single quart.
And every time I see them, a part of my soul (and my bank account) cries a little bit.
As a 22-year-old trying to balance “wellness” with the reality of living in a rental with limited counter space, buying pre-made bone broth feels like a scam.
Especially when you realize it is literally just… boiled bones.
If you’ve been looking for that glowy skin, better gut health, or just a cozy base for your ramen that doesn’t come from a flavor packet, you’re in the right place.
Making bone broth in a slow cooker is the ultimate life hack.
It’s low-effort, high-reward, and makes your entire place smell like a five-star kitchen (or at least like you actually have your life together).
Here is why you need to stop buying the boxed stuff and start making your own
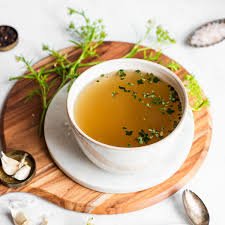
Bone Broth Recipe Slow cooker
Course: AppetizerCuisine: Global / TraditionalDifficulty: Beginner8 to 12
servings10
minutes12
hours50
kcalThis slow cooker bone broth is the ultimate “liquid gold” for anyone looking to hack their wellness and their grocery budget at the same time. By simmering high-quality bones with a few aromatic scraps for 12 to 24 hours, you’re creating a nutrient-dense, collagen-packed elixir that’s way better than anything you’ll find in a cardboard carton.
Ingredients
Bones: 2–3 lbs of high-quality bones (beef marrow bones, chicken carcasses, or a mix).
Water: Enough to cover the bones (usually about 10–12 cups).
Apple Cider Vinegar: 2 tablespoons (the essential “extractor”).
The Veggie Base: 2 carrots, 2 stalks of celery, and 1 large onion (roughly chopped).
Garlic: 4–5 cloves, smashed (don’t even bother peeling them).
Herbs: A few sprigs of fresh parsley, thyme, or rosemary.
Peppercorns: 1 tablespoon of whole black peppercorns.
Salt: 1 teaspoon (you can add more to taste later, but start low).
Directions
- Load the Pot: Toss your bones (roasted or raw) into the slow cooker. Add your vegetables, garlic, peppercorns, and herbs.
- The Acid Step: Pour in your Apple Cider Vinegar.
- Hydrate: Fill the slow cooker with water until everything is submerged by about an inch. Don’t overfill it!
- The Long Wait: Set your slow cooker to LOW. Let it do its thing for at least 12 hours for chicken, or up to 24 hours for beef.
- Strain It: Once the time is up, turn off the heat. Use a slotted spoon to remove the big chunks, then pour the liquid through a fine-mesh strainer into a large bowl or jars.
- The Chill: Let the broth cool to room temperature before putting it in the fridge.
- De-Fat (Optional): Once chilled, a layer of fat will harden on the top. You can scrape this off and discard it (or use it for cooking potatoes!) to reveal the “liquid gold” underneath.
Recipe Video
Why Bone Broth is Actually Worth the Hype
I know, “wellness culture” can be a lot.
One week it’s celery juice, the next it’s something else.
But bone broth is one of those things that actually sticks around because it’s rooted in common sense.
It’s packed with collagen, glucosamine, and amino acids.
Basically, it’s the ultimate “internal moisturizer” for your joints, skin, and hair.
Plus, if you’re someone who deals with a “finicky” stomach (relatable), bone broth is incredibly soothing for the gut lining.
But honestly? My favorite reason is that it’s sustainable.
You’re taking things that would usually go in the trash—chicken carcasses, onion skins, celery ends—and turning them into a superfood.
It’s peak “using every part of the buffalo” energy.
The Slow Cooker: Your New Best Friend
You can definitely make broth on the stove, but if you’re like me and you’re prone to forgetting the stove is even on, that’s a fire hazard waiting to happen.
The slow cooker (Crock-Pot) is the MVP here because it maintains a consistent, low heat.
To get all those minerals out of the bones, you need time.
We’re talking 12 to 24 hours of simmering.
With a slow cooker, you can literally start it before you go to bed, go to work the next day, and it’s done by dinner.
No hovering, no stressing. Just vibes.
The Secret to That “Jiggle” (aka Gelatin)If you’ve ever seen bone broth that looks like Jell-O when it’s cold, that’s the goal.
That “jiggle” means you’ve successfully extracted the collagen.
The secret? A splash of Apple Cider Vinegar.
The acidity helps break down the bones and pull out all the good stuff.
Don’t worry, you won’t taste it at the end.
Also, don’t be afraid of the “weird” parts.
Adding a couple of chicken feet or a marrow bone makes a world of difference in the texture.
It sounds a little “witchy,” but trust the process.
Maximizing Your Scraps
Pro tip: Keep a gallon-sized freezer bag in your freezer.
Every time you chop an onion, save the ends and the skins (the skins give the broth a beautiful golden color).
Save the leafy tops of the celery and the peels of your carrots.
Once the bag is full, it’s broth time.
This makes the recipe practically free because you’re using stuff you already paid for.
How to Actually Use Your Broth
Don’t just stare at it in the fridge.
- Sip it straight: Heat a mug of it with a little sea salt and lemon juice in the morning. It’s a great coffee alternative if you’re trying to cut back on caffeine.
- Upgrade your grains: Use broth instead of water when cooking rice or quinoa. It adds so much protein and flavor.
- The Best Ramen: Use it as the base for your Maruchan or Shin Ramen. It turns a $1 meal into a gourmet experience.
- Freeze it: Pour the broth into ice cube trays. Toss a “broth cube” into a pan when you’re sautéing veggies for a quick flavor boost.
Final Thoughts
Making bone broth is one of those small rituals that makes me feel like I have my life together, even if my laundry has been sitting in the dryer for three days.
It’s cheap, it’s healthy, and it’s incredibly satisfying to see those jars lined up in the fridge.
It’s about taking care of yourself in a way that’s sustainable and realistic.
Give it a try this weekend.
Your gut (and your wallet) will definitely thank you.
Happy simmering!